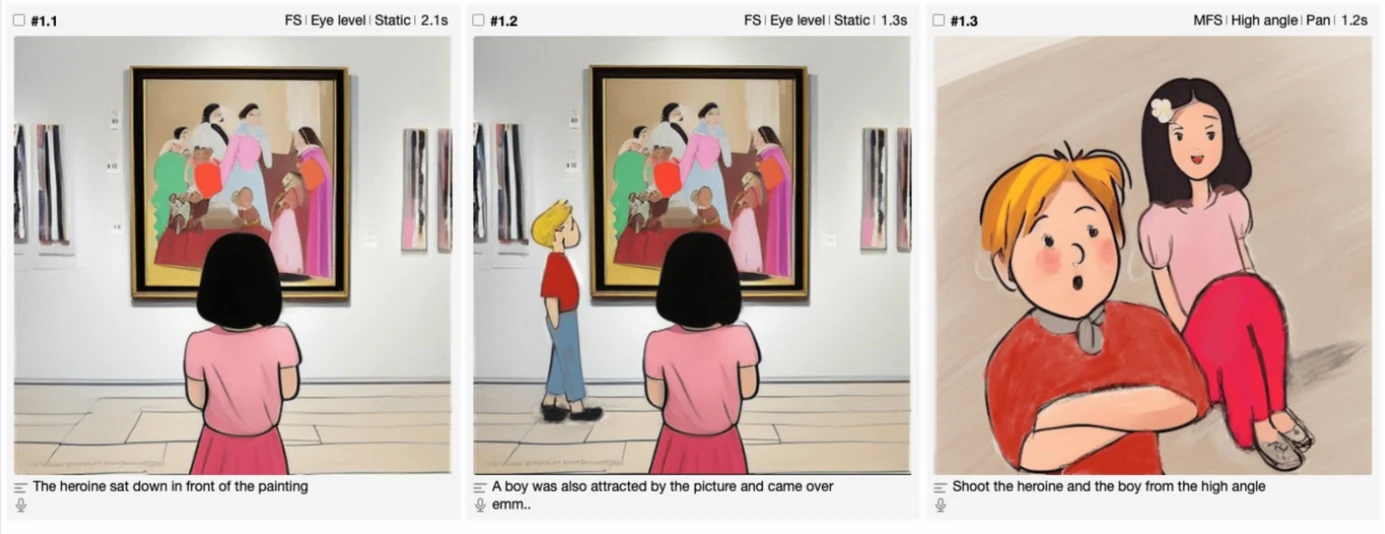
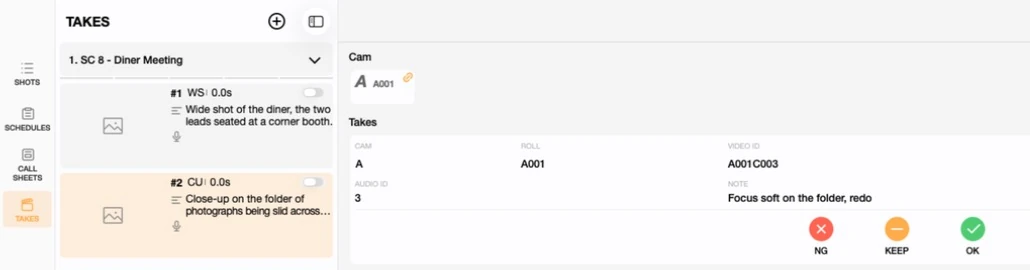
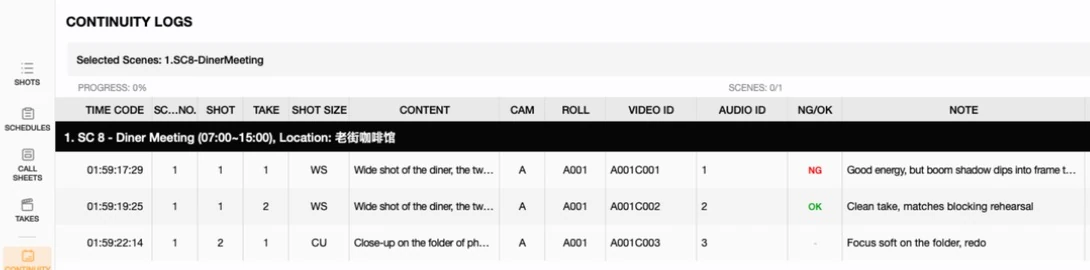
A shot list is the working document every department actually reads: the DP checks lenses against it, the AD schedules the day around it, the editor cuts against it later. In Previs Shot, the shot list lives in the SHOTS view — and it does a lot more than hold a column of shot sizes. This tutorial is a full walkthrough of that view: its fields, its three display modes, custom columns, and the selection tools that make editing a long shot list fast.
1. What Is a Shot List?
A shot list (also called a shooting shot list or shot breakdown) is a structured, shot-by-shot record of everything a scene needs on camera: shot size, camera angle, movement, lens, duration, dialogue, sound, lighting, and more. Where a script tells you what happens, a shot list tells you exactly how you plan to film it, one row at a time.
Why a shot list matters
- Turns a script into a plan: everyone on set works from the same row-by-row breakdown instead of improvising blocking on the day.
- Makes scheduling possible: an AD can only group shots by location, lighting setup, or equipment if that information is written down somewhere structured.
- Prevents missed coverage: a numbered list makes it obvious when a shot got skipped or a scene is one insert short.
- Survives past the shoot: the same rows carry through to the schedule, the call sheet, and eventually the edit.
A shot list is a close cousin of a storyboard — both break a scene into shots — but they solve different problems. If you're curious how the two relate, see our Storyboard Basics tutorial. This one is entirely about the shot list tool itself.
2. Anatomy of the Previs Shot SHOTS View
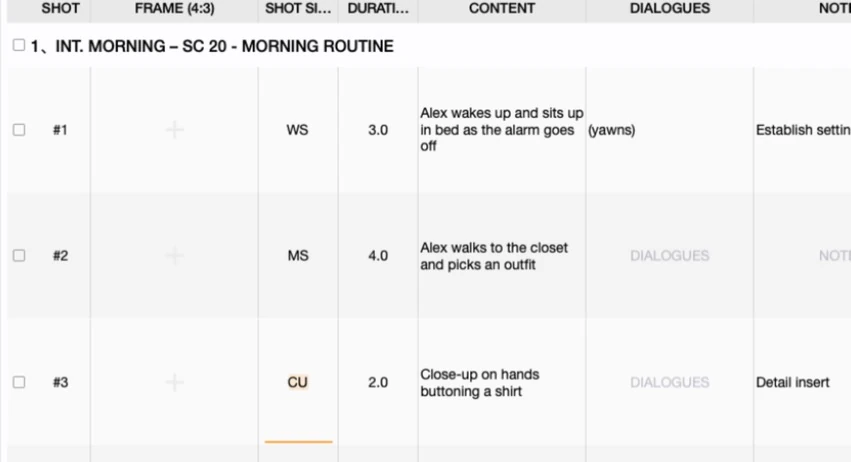
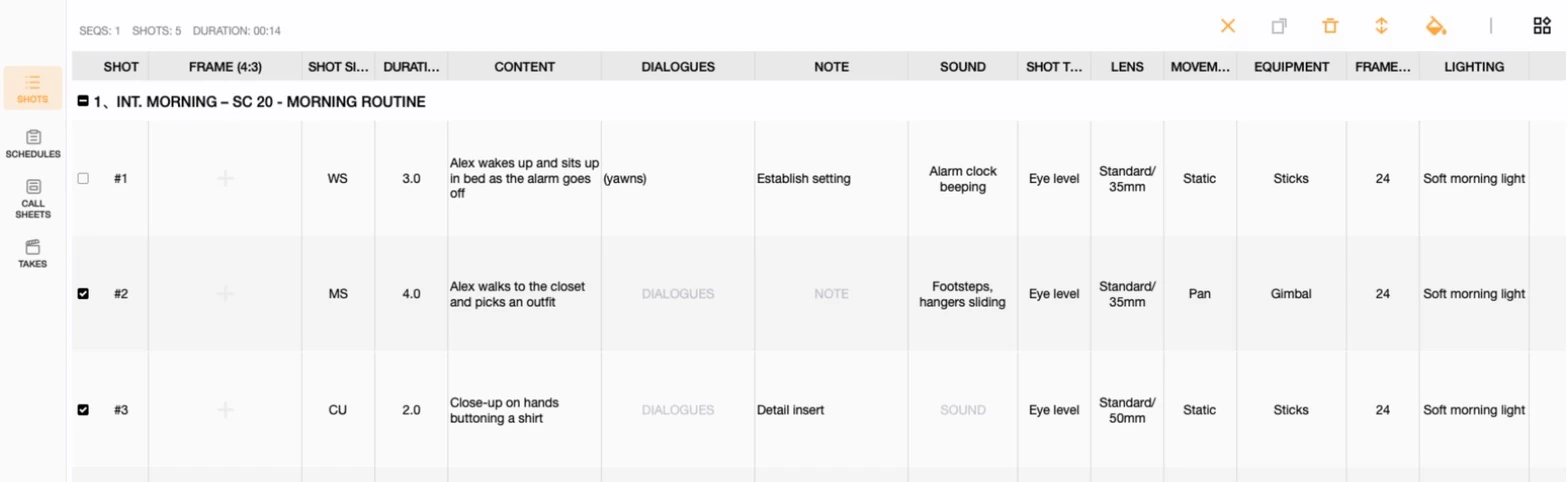
Every project in Previs Shot organizes shots inside Sequences (scenes), and every sequence is a row group inside the SHOTS view. Each shot is a row, and each column is a field you can fill in. Here is a real shot list from a demo project we built for this tutorial, "Shot List Basics Demo", scene "SC 20 - Morning Routine":
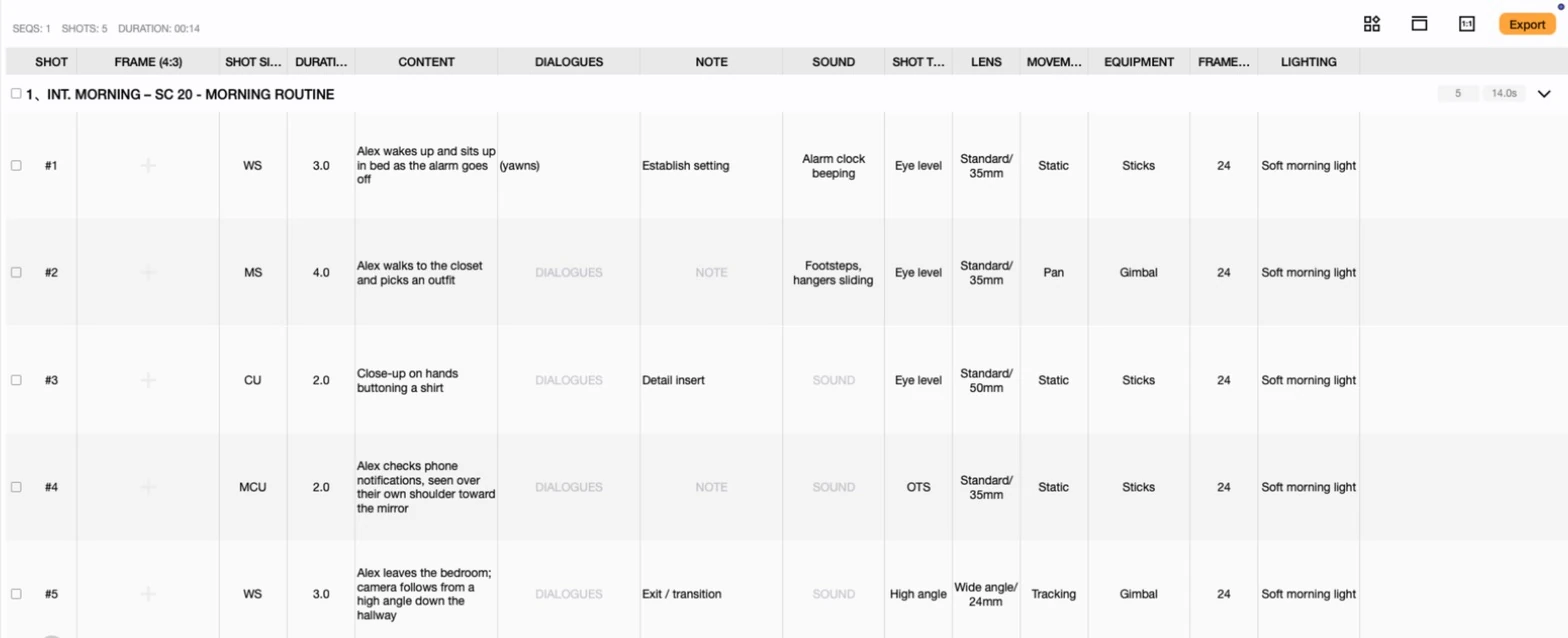
That is a lot of columns, and you rarely need all of them for every project. The fields break down into a few groups:
- Identity: SHOT (number) and FRAME (a thumbnail of the drawn or imported storyboard sketch for that shot).
- Cinematography: SHOT SIZE, SHOT TYPE, MOVEMENT, LENS — the four fields covered in our Shot Size Basics and Shot Type Basics tutorials.
- Story: CONTENT (what happens), DIALOGUES, NOTE.
- Production: DURATION, SOUND, EQUIPMENT, FRAME RATE, LIGHTING.
Every one of these fields (aside from the FRAME thumbnail) is free text, so your team can use whatever shorthand and vocabulary you already work in — Previs Shot doesn't force a fixed vocabulary on you.
3. Three Ways to Look at Your Shots
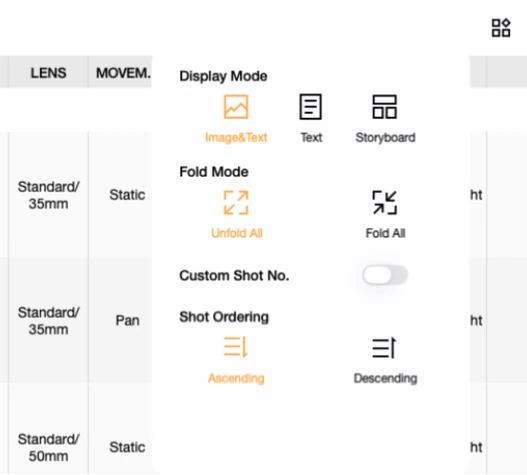
The SHOTS view isn't locked to a single layout. A display-mode switcher in the top-right corner lets you flip between three ways of looking at the exact same shot data:
3.1 Image & Text
The default table view shown above — every column, with a small FRAME thumbnail on the left of each row. Best for day-to-day editing when you want the full picture.
3.2 Text
The same table with the FRAME thumbnail column removed, so the row height shrinks and you can scan more shots at once — handy for a long sequence where you're mainly checking text fields like CONTENT or DIALOGUES.
3.3 Storyboard
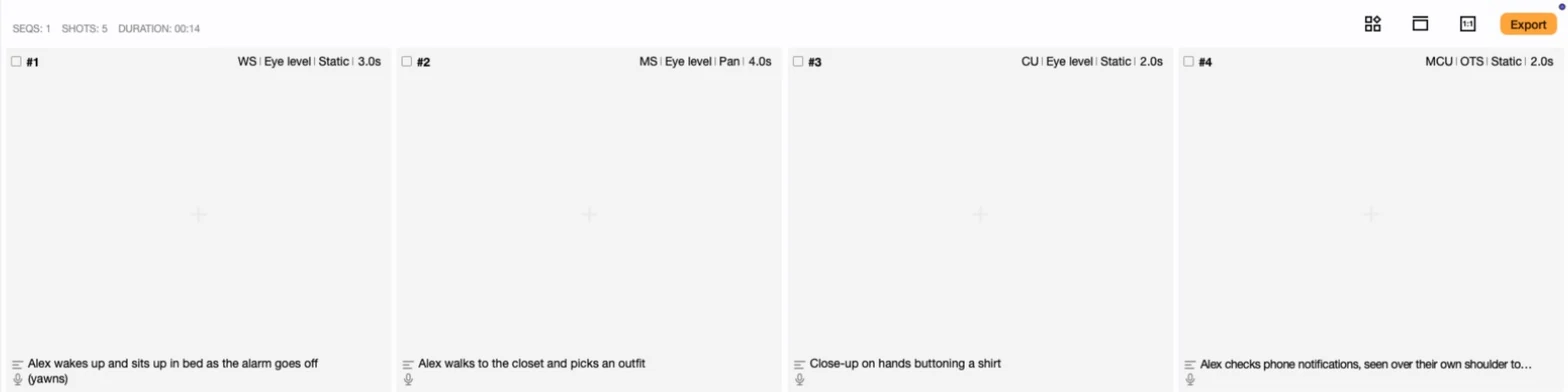
A completely different layout: shots become panels in a grid (2, 3 or 4 columns), each one showing its key metadata as a badge line, a large frame area for the sketch, and the content note underneath — much closer to a traditional storyboard hand-out. This is also the view we use to demonstrate the storyboard-to-shot-list workflow in our Storyboard Basics tutorial.
4. Customizing Columns
Not every project needs all fourteen columns visible at once. The column-manager panel (next to the display-mode switcher) lets you show or hide any column with the eye icon, and reorder columns by dragging the handle on the right:
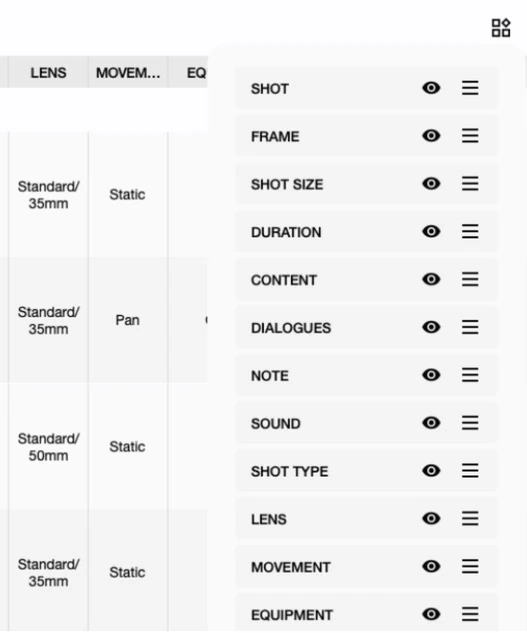
A simple rule of thumb: hide what your team doesn't use. A documentary crew might never touch EQUIPMENT or FRAME RATE; a commercial crew might hide DIALOGUES entirely. The shot list should match how your team actually talks about a scene, not the other way around.
5. Editing Shots: Text Mode and Selection Mode
5.1 Text mode: click a cell, type, done
Every field, including the cinematography columns, edits the same way: click (or double-click) a cell and type directly. There's no fixed dropdown forcing you into a closed vocabulary — this is the same free-text behavior we describe in the Shot Size and Shot Type tutorials, now visible across every column.
5.2 Selection mode: bulk actions
Click the checkbox on the left of any row and the view switches into selection mode: a small toolbar appears with cancel, duplicate, delete, move and color-tag actions, and every checkbox you tick joins the selection. This is the fast path for reordering a block of shots, deleting a run of cut inserts, or color-coding shots that belong to the same setup.
6. Other Controls Worth Knowing
- Fold Mode: Fold All collapses every sequence down to its header row so you can see the whole project at a glance; Unfold All expands them back out.
- Custom Shot No.: turn this on if you need shot numbers that don't follow the default sequential scheme (matching a script's own numbering, for example).
- Shot Ordering: flip a sequence between ascending and descending shot order.
- FRAME aspect ratio: a separate control next to the column manager sets the default aspect ratio (16:9, 9:16, 4:3, 1:1, and more) for every FRAME sketch in the project.
- Export: the orange Export button turns the current shot list into a PDF or spreadsheet you can hand to anyone who isn't in the app.
7. Where the Shot List Fits in the Pipeline
The SHOTS view is the source of truth that everything downstream reads from:
SHOTS (shot list) → SCHEDULES → CALL SHEETS → TAKES
- SHOTS: define every shot — size, angle, movement, gear, sketch.
- SCHEDULES: place those shots onto shooting days, grouped however makes the day efficient.
- CALL SHEETS: hand the day's shots and logistics to the whole crew.
- TAKES: log what actually got shot against the plan, on set.
8. Tips for Beginners
- Start with fewer columns: show SHOT SIZE, SHOT TYPE, CONTENT and DURATION first, then add MOVEMENT, LENS or EQUIPMENT once your team actually needs them.
- Use Text mode for a first pass, Image&Text for the final one: block out the text fields quickly, then switch on the FRAME thumbnail once you start sketching.
- Use Storyboard mode for pitching: the panel layout reads much better than a spreadsheet when you're walking a director or client through a sequence.
- Keep a naming convention and write it down: since every field is free text, a one-line style guide for your team prevents "CU" and "Close-Up" showing up in the same project.
- Reach for selection mode early: it's much faster than editing rows one at a time once a sequence grows past a handful of shots.
This tutorial is part of the Previs Shot tutorial series. A well-built shot list is what turns a script into a plan the whole crew can actually shoot from.